It’s a pirate’s life for me!
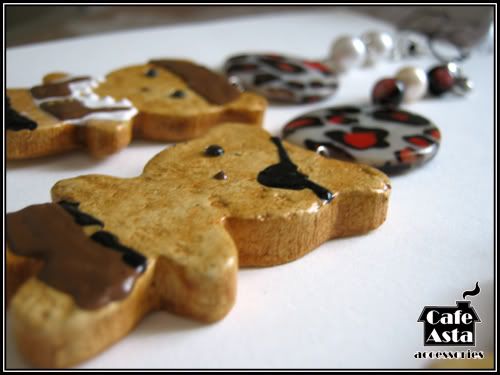
Hello again, Angela here to show you a sneak peek at another one of our delicious looking cookie pieces: Pirate bears!
You can say that this series was if not commissioned then inspired by a fund raiser we were invited to last winter for the GTA Rollergirls…. And used as a prize set for Raffle draws.
I knew right away that I wanted to be pirates. There’s something about pirates that are tough and yet playful, especially when they are cute, big headed teddy bears. How could I go wrong? As per usual I started off with Das brand Air dry paper clay and cut out the bear bases. This was a cutter we had never used before, and I like to call it ‘baby bear’ because it has a huge head, like babies do (Or is it just my imagination?)
Next (as they dried for about 24-48 hours) I had to think of how pirates dressed, what colors these bears might wear, and what flavors they would look the best in. Using Acrylic paint for the body (mmm graham cracker flavor) and gems for the eyes, the cuteness only increased.
With puff paint for the clothing, I tried to make each one of them different. Too bad I couldn’t really fit small details like dreads or long beards, but I had the most fun by far with the skulls on the bandanas.
Lastly I added a leopard printed pearlescent bead and some other small treasures and voila! The set of 8 pirates were ready! (theres an extra in the image)
To finish everything off I had to make a hot gun package using small zippered raft bags and our business cards. I’ll admit it was pretty ghetto looking, but I honestly made the packaging 20 minutes before leaving the house. It was pretty random and I can promise you our new (more thought out) packaging is a lot nicer. In this case I hoped the quality of the charms and their adorability would make up for the random display. Next time I’ll be more careful and prepared!
Thanks for checking out our cute little bears! Critiques and comments are muchos appreciated so don’t be shy!
Showing posts with label Tutorials. Show all posts
Thursday, May 5, 2011
Thursday, April 7, 2011
Behind the Scenes Part 1: Cookies
Hello everyone and welcome again to Café ASTA!
Angela here, reporting for duty; its been a long time, hasn’t it? Now that Winter is over, with spring comes renewed energy and new ideas for crafts.
But first things first: both Steph and I think that we are way overdue with introducing some of the things we’ve made since our debut. Sorry everyone for being unable to post these sooner.
When we started coming up with the idea of Café Asta, Steph and I originally wanted to try a whole bunch of different kinds of Sweets deco, but knew that we had to take it slowly, so we decided to limit it to only a few specific kinds of bases: Cookies, Pies, Waffles and Biscuits.
It doesn’t sound like much but as you may have noticed in our introductory pictures from December, there really is a LOT you can do with just these four types of bases!
It all depends on the sizes, colors and toppings one might want to decorate with, so honestly we stuck the types of things we already knew tasted great and thus made sense for a real-life inspired style. Experimentation followed not long after.
This week's pick:
These were the first that I tried to make and they came out much better than I had expected for being inexperienced with clay modeling.
In the beginning, everything we made was originally from white coloured air dry clay that of which we coloured ourselves using acrylic paint or chalk pastels.
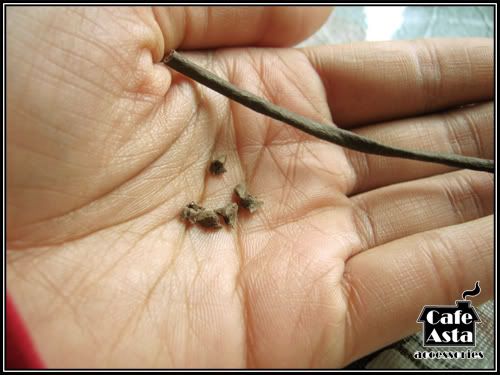
For things like bananas and cookie dough it was quite easy, but the hardest part of making a chocolate chip cookie hands-down is coloring the chocolate chips.
While kneading a ball of clay about the size of a quarter, you have to add the brown paint little by little: Too much and it would be a huge slimy mess, too little and you’d be there forever. More than once I had been sitting there, kneading the colour completely through the clay for more than 30 minutes!!
Thought I was getting Arthritis from the hand cramps by the end of the week (haha)
It was brief, but this is just part 1 of a "behind the scenes" series on the items we offer. Stay tuned for the next in the series: ~biscuits!~
In the beginning, everything we made was originally from white coloured air dry clay that of which we coloured ourselves using acrylic paint or chalk pastels.
For things like bananas and cookie dough it was quite easy, but the hardest part of making a chocolate chip cookie hands-down is coloring the chocolate chips.
Thought I was getting Arthritis from the hand cramps by the end of the week (haha)
It was brief, but this is just part 1 of a "behind the scenes" series on the items we offer. Stay tuned for the next in the series: ~biscuits!~
Subscribe to:
Posts (Atom)